Paint 3D is a built-in creative application that comes free with Windows 10*. You don’t need any design experience – Paint 3D makes it easy to customize models from the built-in 3D library or create 3D designs from scratch.
Here’s a couple of tips for how you can get started quickly in creating in 3D.
How to edit a 3D model
The easiest way to get started is to start by searching our 3D library** for a model to edit and customize. Simply click on 3D Library and browse through our staff picks of top models or type in the search bar a model you are looking for. Click on the tile to import the 3D model into your project. You now have a fully rotatable 3D model that you can recolor and personalize with great sticker textures.
How to create a 3D Model
One of my favorite ways to get started in 3D is to begin with a photo image or 2D sketch. You can use this as a guide for your 3D drawing. Click on 3D Shapes and select one of the 3D doodle tools, sharp or soft edge depending on your preference. Draw in a continuous movement, making sure not to overlap the lines and connecting to the starting circle. Watch as your 2D sketch instantly transforms into a fully rotatable 3D model. You can use the brushes to shade and color the model or the sticker tool to add additional finishes, such as wood or marble. Use a picture background remover tool to change or remove blurred background from your images.
See it in the real world

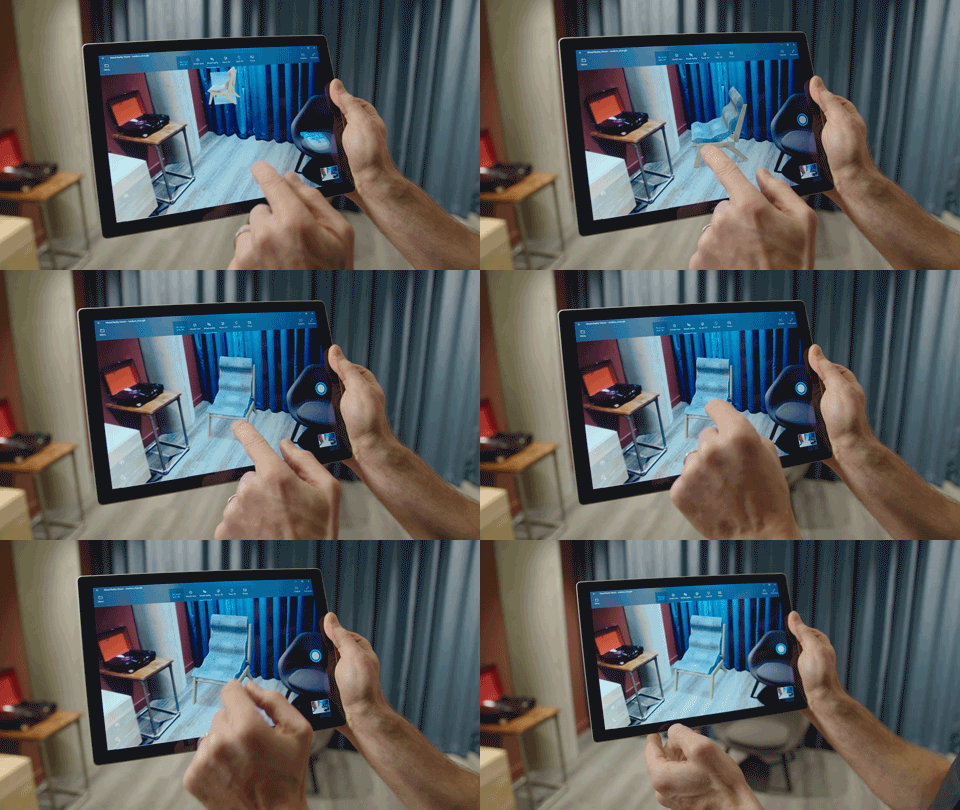
Visualize your 3D model in the real world – perfect for showing a family member what a fountain will look like your backyard or using your 3D model to record an online tutorial video. When you’re finished editing your 3D model, simply go up to the task bar and click on the Mixed reality button (this will pre-load your 3D model in Mixed Reality Viewer).
Tap your screen to place the object into your world. You can rotate the object or make it bigger or smaller or drag it to different locations on the screen. You can also add animations to your model, perfect for videos, at the bottom of the screen. To record a short video, click on the video record button to the right. You can also switch to take a picture with the camera button.
Save and share a 3D creation
Within Paint 3D, you can save or share your work in a variety of ways.
- If you want to save your work to edit again later, then you can click “Save As” a Paint 3D project. Paint 3D projects will retain all your 2D and 3D content without any compression – meaning you can re-open them and pick up exactly where you left off.
- If you want to take content out of Paint 3D, to share or use in other applications, then you have options to save a copy as a 3D model or an image. If you choose to Save a 3D model, then you can choose from different popular 3D file formats, such as .GLB or .FBX.
- If you choose to save an image, you are taken to the Image Preview window. Within this window you can choose to rescale your image, either by percentage or number of pixels. Ticking ‘Lock aspect ratio’ means changes to one side will automatically update the other. You can also adjust the desired angle and framing of the image.
Paint 3D makes it easy to unlock your creativity and bring your ideas to life. To check out these features for yourself, you can get started by opening the Paint 3D app. If you’re new to Paint 3D, check out our video tutorials on Paint 3D.
*To access all the latest Paint 3D features, you will need to update to the latest Windows 10 April 2018 Update. To learn how to get the Windows 10 April 2018 Update, check out this blog post.
**3D Library is available in select markets. Check out the online library here.
Source: Windows Blog
—