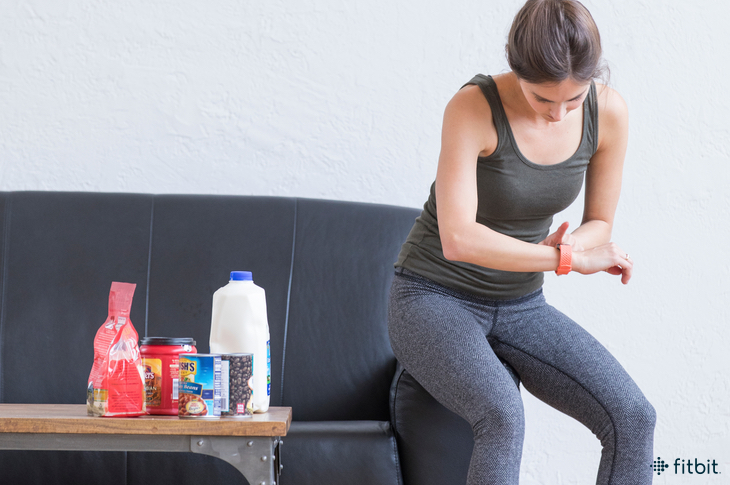
You’re short on time, can’t make it to a gym, and have limited equipment. Sounds like a formula for failure, right? Wrong. This quick, one-weight workout proves that the stuff you’ve got around the house can help you hit your strength-training goals—fast! If a single dumbbell or kettlebell isn’t an option, you can reach for a can of soup, bag of rice, jug of milk, heavy book, or a storage container. Get ready for a full-body workout that challenges you to chase the burn—and get creative—with found objects.
Beginners, do all six moves, resting for 1 to 2 minutes between each. Then repeat the entire circuit once more. More advanced exercisers can do the entire circuit three times, with a minute rest between movements. Eliminate the rest intervals completely for an added challenge.
1. Goblet Squat
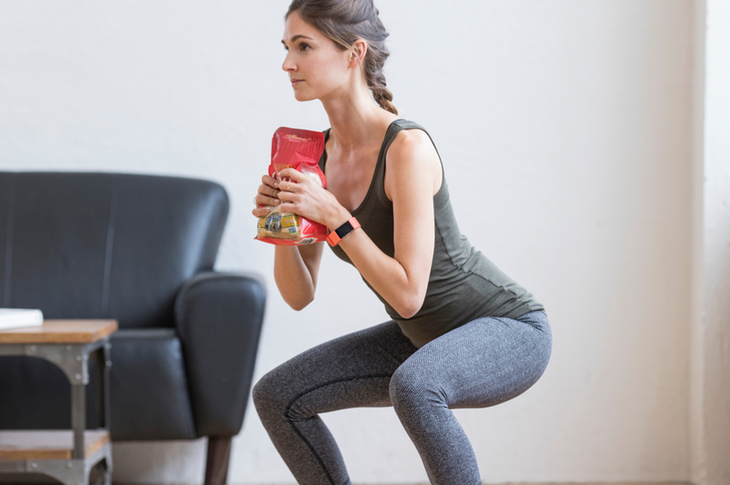
Get in lower-body work and strengthen your thighs, legs, and calves with this one-weight movement. For this at-home version, substitute traditional weights for a bag of rice.
- With your feet shoulder-width apart and the weight in your heels, hold the object against your chest.
- Keeping your torso upright and elbows pointed down and close to your sides, push your butt back.
- Lower yourself into the squat until your knees are at about a 90-degree bend. Think of pushing your rear back (like sitting in a chair) as opposed to merely lowering.
- Once you break parallel, get back into standing position by pushing up through your heels, squeezing your glutes at the top.
- Repeat for 8-10 reps.
2. Weighted Lunge With Twist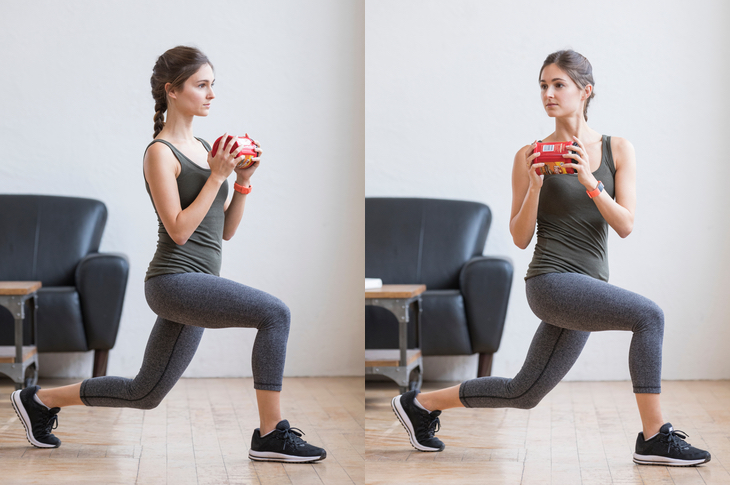
There’s a reason lunges make an appearance in most workouts—they’re a great lower-body blaster that simultaneously target your glutes, hips, hamstrings, and quads. Looking to add in a bit of core work? Using the same bag of rice as your weight, twist your torso to the left and right at the end of each rep to engage your obliques, and make this a multifunctional movement.
- Keep your torso upright and your shoulders back and relaxed. Keeping your elbows by your side, hold a weight a few inches in front of you.
- Step forward with one leg and lower your body down until both knees are at a 90-degree angle.
- Twist your torso and the weight to one side. Come back to the center, and repeat on the other side. Make sure that your knees don’t go past your toes at the bottom of the movement.
- Repeat for 8-10 reps.
3. Plank
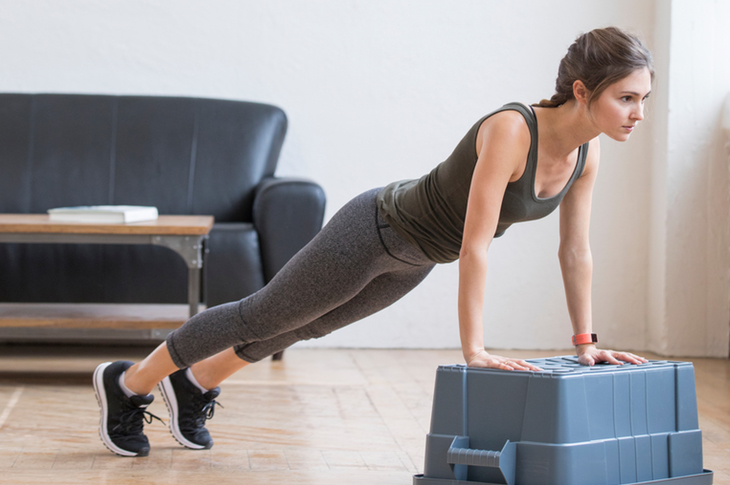
If you think hundreds of crunches are the only way to carve your core, you’re mistaken. Put your abs to work with this isometric movement that focuses on core stability. This controlled ab exercise targets all of the major muscle groups while promoting stability and balance. Add a medicine ball and you’ll increase the instability and difficulty of the movement. Just be sure to keep your hips down and body stable. No medicine ball? Make extra use of that storage box by using it to elevate your body (and your workout).
- Kneel on the floor, resting both hands on the object. Push your body up, and extend your legs behind you until you’re in a plank position.
- Press down on the medicine ball or other sturdy object, keeping your body aligned.
- Hold for 20 seconds, and build on your endurance each time.
4. One-Legged Deadlift
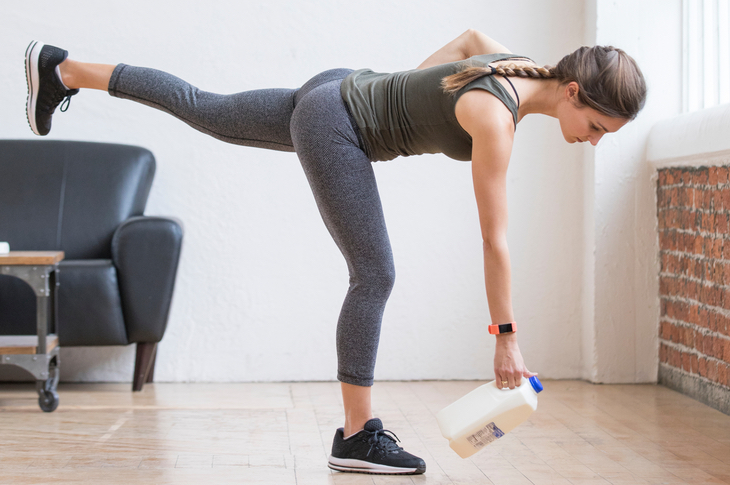
Get your glutes firing and really engage your posterior chain—everything from your butt to your lower back and hamstrings. By focusing on a slow-and-controlled movement, you’ll improve balance, build strength, and prevent injuries that can result from jerking the weight up. Here’s where a jug of milk can really help you get strong.
- Hold a milk jug in one hand, keeping the foot on that side stationary while raising the opposite leg.
- With the knee of your standing leg slightly bend, hinge forward and lower the weight. Use your “free” leg for balance and extend it behind you.
- Lower until you are parallel to the ground. Then, return to the top of the movement.
- Repeat for 8-10 reps.
5. Weighted Push-up
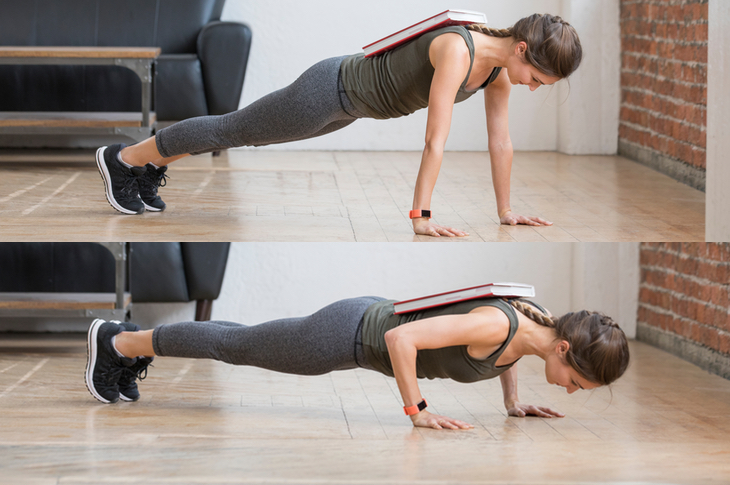
Reaching a full range of motion is key for push-ups. And maintaining proper form—with your body in one straight line and weight slightly forward—is essential. If you’ve got that down, and can bust out a bunch without feeling fatigued, it might be time to add some weight. What, you don’t keep barbells and bumper plates in your living room? NBD. Here’s where large books (think dictionaries or old phone books) become useful.
- Get into a plank position (making sure your hips stay high, your chest doesn’t sway, and your body stays aligned), and place a book on your mid back.
- With your hands slightly wider than shoulder-width apart and shoulders stable (forearms facing forward), lower yourself down. Make sure your core is engaged and glutes are tight as you descend.
- Once your shoulder blades come together, push yourself back up.
- Repeat for 8-10 reps.
6. Triceps Kickback 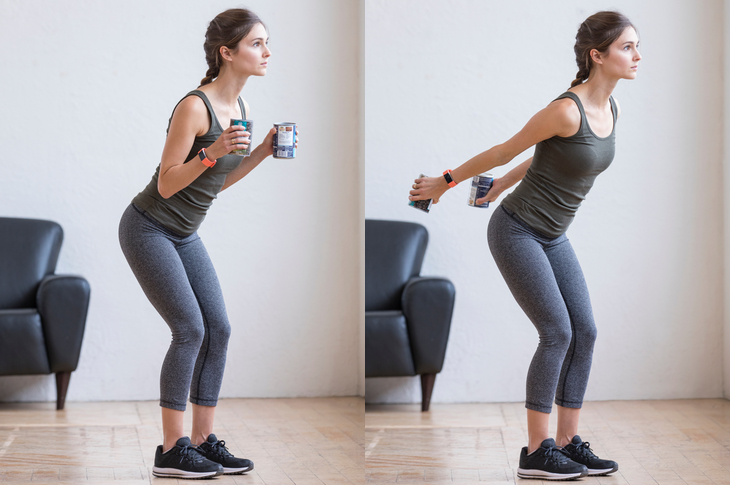
Get ready to take things up a notch with two weights. This movement can still be done unilaterally (or one arm at a time), but try to embrace the challenge of two as you tone up saggy arms in one simple movement. The evenly-distributed weight of dumbbells works well for this movement, but household items like soup cans are good substitutes.
- Grip a soup can in each hand with your palms facing your torso.
- Keeping your back straight, hinge forward at the waist. The dumbbells should be by your sides and your knees should be slightly bent.
- Keep your upper arms still as you exhale and lift the weight back until your arms are fully extended.
- Return to start, and repeat for 12-15 reps.
The post Got 15 Minutes And A Bag Of Rice? Try This Beginner-Friendly Strength Workout! appeared first on Fitbit Blog.
Source: Fitbit Blog
—