We’ve just published an update to the Console UWP App project templates on the Visual Studio marketplace here. The latest version (v1.5) adds support for C#. The C# template code only works with Visual Studio 2017 version 15.7 or later. In a previous post, I described how to build a simple findstr UWP app using the C++ Console templates. In this post, we’ll look at how to achieve the same with C#, and call out a few additional wrinkles you should be aware of.
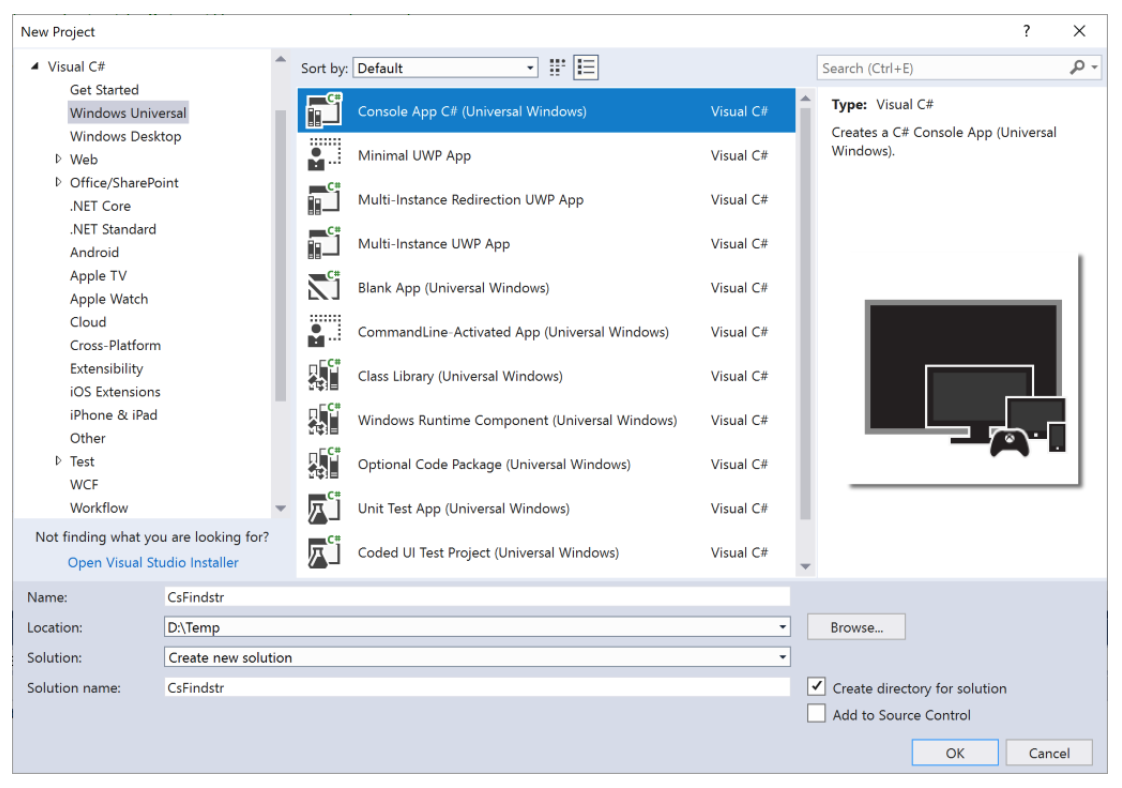
Having installed the updated VSIX, you can now choose a C# Console UWP App from the New Project dialog:
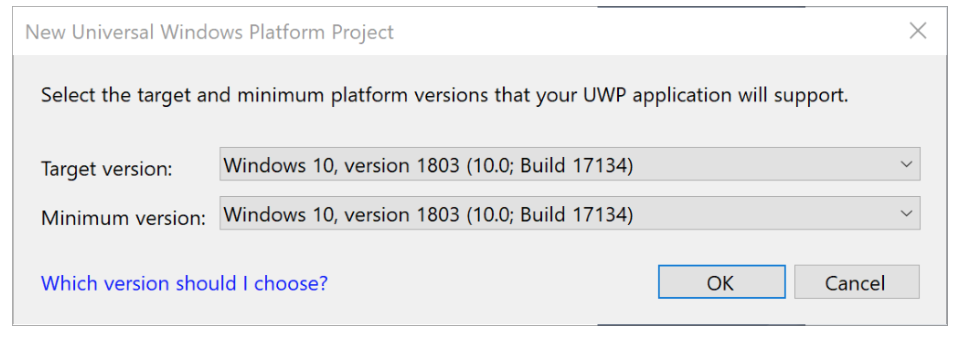
Note that C# console apps are only supported from version 10.0.17134.0 of the platform. You should therefore specify a version >= 10.0.17134 for the minimum platform version when you create your project. If you forget this step, you can fix it at any time later by manually editing your .csproj and updating the TargetPlatformMinVersion value.
Also note that with the C# template, you might get the error message “Output type ‘Console Application’ is not supported by one or more of the project’s targets.” You can safely ignore this message – even though it is flagged as an error, it doesn’t actually make any difference to anything and doesn’t prevent the project from building correctly.
As with the C++ template, the generated code includes a Main method. One difference you’ll notice with the C# version is that the command-line arguments are passed directly into Main. Recall that in the C++ version, you don’t get the arguments into main, but instead you need to use the global __argc and __argv variables. Notice that you can also now use the System.Console APIs just as you would in a non-UWP console app.
static void Main(string[] args)
{
    if (args.Length == 0)
    {
        Console.WriteLine("Hello - no args");
    }
    else
    {
        for (int i = 0; i < args.Length; i++)
        {
            Console.WriteLine($"arg[{i}] = {args[i]}");
        }
    }
    Console.WriteLine("Press a key to continue: ");
    Console.ReadLine();
}
As before, for the file-handling behavior needed for the findstr app, you need to add the broadFileSystemAccess restricted capability. Adding this will cause your app to get some extra scrutiny when you submit it to the Store. You will need to describe how you intend to use the feature, and show that your usage is reasonable and legitimate.
xmlns:rescap="http://schemas.microsoft.com/appx/manifest/foundation/windows10/restrictedcapabilities"
  IgnorableNamespaces="uap mp uap5 desktop4 iot2 rescap">
…
  <Capabilities>
    <Capability Name="internetClient" />
    <rescap:Capability Name="broadFileSystemAccess" />
  </Capabilities>
Because the app will be doing some simple file handling and pattern matching, in the C++ version, I had to #include the Windows.Storage.h and regex, and declare the corresponding namespaces. In C#, you need the equivalent Windows.Storage and System.Text.RegularExpressions namespaces.
For the findstr functionality, recall that I’m expecting a command-line such as “CsFindstr foo C:Bar”, where “foo” is the pattern to search for, and “C:Bar” is the folder location from which to start the recursive search. I can strip out all the generated code in Main, and replace it with firstly a simple test for the expected number of command-line arguments, and secondly a call to a RecurseFolders method (which I’ll write in a minute). In the C++ version, I tested __argc < 3, but in the managed version I need to test the incoming args.Length for < 2 (the executable module name itself is not included in the C# args).
static void Main(string[] args)
{
    if (args.Length < 2)
    {
        Console.WriteLine("Insufficient arguments.");
        Console.WriteLine("Usage:");
        Console.WriteLine("   mFindstr <search-pattern> <fully-qualified-folder-path>.");
        Console.WriteLine("Example:");
        Console.WriteLine("   mFindstr on D:Temp.");
    }
    else
    {
        string searchPattern = args[0];
        string folderPath = args[1];
        RecurseFolders(folderPath, searchPattern).Wait();
    }

    Console.WriteLine("Press a key to continue: ");
    Console.ReadLine();
}
Now for the custom RecurseFolders method. Inside this method, I need to use a number of async methods for the file handling, so the method needs to be declared async – and this is also why I called Wait() on the Task return from the method back up in Main. I can’t make Main async, so I must make sure to contain all meaningful async return values within the lower-level methods.
In this method, I’ll get the StorageFolder for the root folder supplied by the user on the command-line, get the files in this folder, and then continue down the folder tree for all sub-folders and their files:
private static async Task<bool> RecurseFolders(string folderPath, string searchPattern)
{
    bool success = true;
    try
    {
        StorageFolder folder = await StorageFolder.GetFolderFromPathAsync(folderPath);

        if (folder != null)
        {
            Console.WriteLine(
                $"Searching folder '{folder}' and below for pattern '{searchPattern}'");
            try
            {
                // Get the files in this folder.
                IReadOnlyList<StorageFile> files = await folder.GetFilesAsync();
                foreach (StorageFile file in files)
                {
                    SearchFile(file, searchPattern);
                }

                // Recurse sub-directories.
                IReadOnlyList<StorageFolder> subDirs = await folder.GetFoldersAsync();
                if (subDirs.Count != 0)
                {
                    GetDirectories(subDirs, searchPattern);
                }
            }
            catch (Exception ex)
            {
                success = false;
                Console.WriteLine(ex.Message);
            }
        }
    }
    catch (Exception ex)
    {
        success = false;
        Console.WriteLine(ex.Message);
    }
    return success;
}
The GetDirectories method is the actual recursive method that performs the same operation (get the files in the current folder, then recurse sub-folders):
private static async void GetDirectories(IReadOnlyList<StorageFolder> folders, string searchPattern)
{
    try
    {
        foreach (StorageFolder folder in folders)
        {
            // Get the files in this folder.
            IReadOnlyList<StorageFile> files = await folder.GetFilesAsync();
            foreach (StorageFile file in files)
            {
                SearchFile(file, searchPattern);
            }

            // Recurse this folder to get sub-folder info.
            IReadOnlyList<StorageFolder> subDirs = await folder.GetFoldersAsync();
            if (subDirs.Count != 0)
            {
                GetDirectories(subDirs, searchPattern);
            }
        }
    }
    catch (Exception ex)
    {
        Console.WriteLine(ex.Message);
    }
}
Finally, the SearchFile method, which is where I’m doing the pattern-matching, using Regex. As before, I’m enhancing the raw search pattern to search for any whitespace-delimited “word” that contains the user-supplied pattern. Then I walk the returned MatchCollection, and print out all the found “words” and their position in the file.
private static async void SearchFile(StorageFile file, string searchPattern)
{
    if (file != null)
    {
        try
        {
            Console.WriteLine($"Scanning file '{file.Path}'");
            string text = await FileIO.ReadTextAsync(file);
            string compositePattern =
                "(S+s+){0}S*" + searchPattern + "S*(s+S+){0}";
            Regex regex = new Regex(compositePattern);
            MatchCollection matches = regex.Matches(text);
            foreach (Match match in matches)
            {
                Console.WriteLine($"{match.Index,8} {match.Value}");
            }
        }
        catch (Exception ex)
        {
            Console.WriteLine(ex.Message);
        }
    }
}
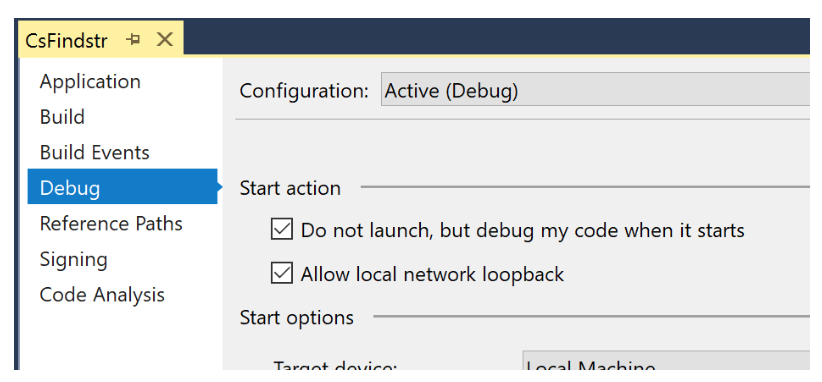
With this, I can now press F5 to build and deploy the app. For console apps it often makes sense to set the Debug properties to “Do not launch, but debug my code when it starts” – because the most useful testing will be done with varying command-line arguments, and therefore by launching the app from a command prompt rather from Visual Studio.
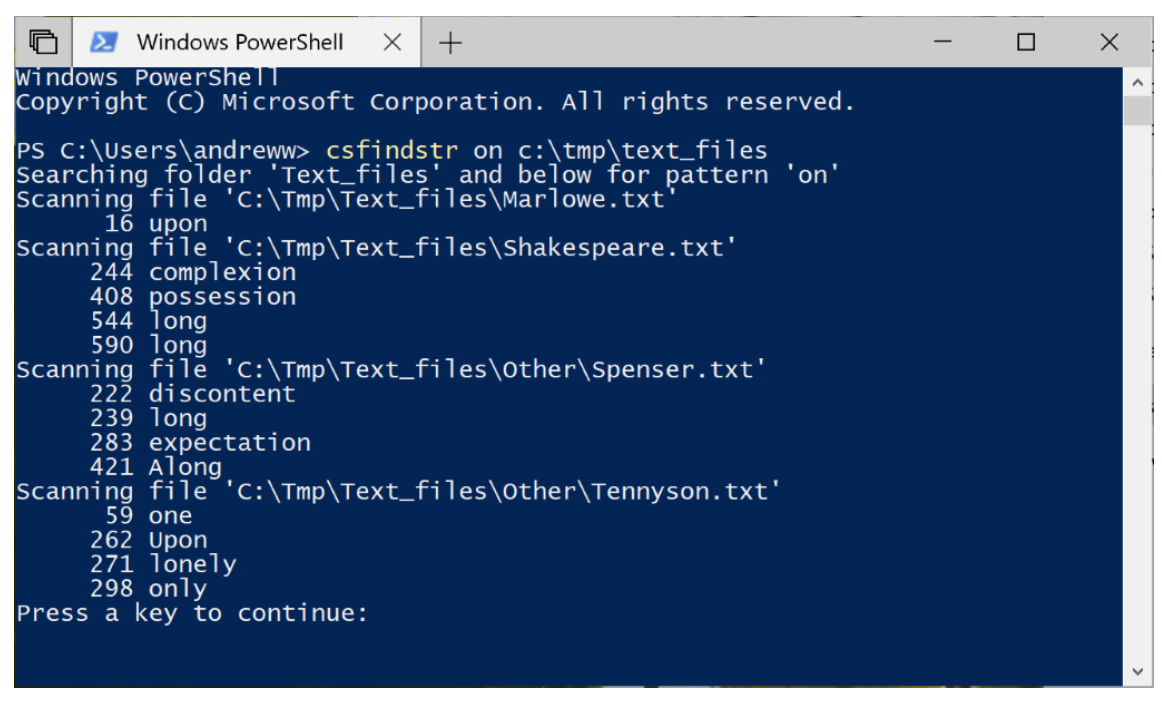
I can test the app using a command window or powershell window:
That’s it! You can now write Console UWP apps in C#. Full source code for this sample app is on Github here.
Source: Windows Blog
—


