Bon Appetit! How to take perfect food photography using your Xperia
Whether you’re visiting a restaurant with divine, flavoursome dishes, or you’ve cooked up something scrumptious at home, the chances are you’ll want to take a photo of what you’re about to eat.
In fact, sharing a photo with friends, family and followers on social media and watching the likes roll in is (almost) as good as eating the food itself!
So, you’ll be glad to know that with the newly launched Xperia 10 and Xperia 10 Plus, taking incredible food photography has never been easier.
Both smartphones are able to capture images in the 21:9 ratio, meaning you have extra room to play with when it comes to capturing the perfect shot. The devices’ cameras (the Xperia 10 comes with a 13MP + 5MP while the Xperia 10 Plus boasts 12MP + 8MP) pack in many of Sony’s premium technologies, so you can be sure of outstanding results.
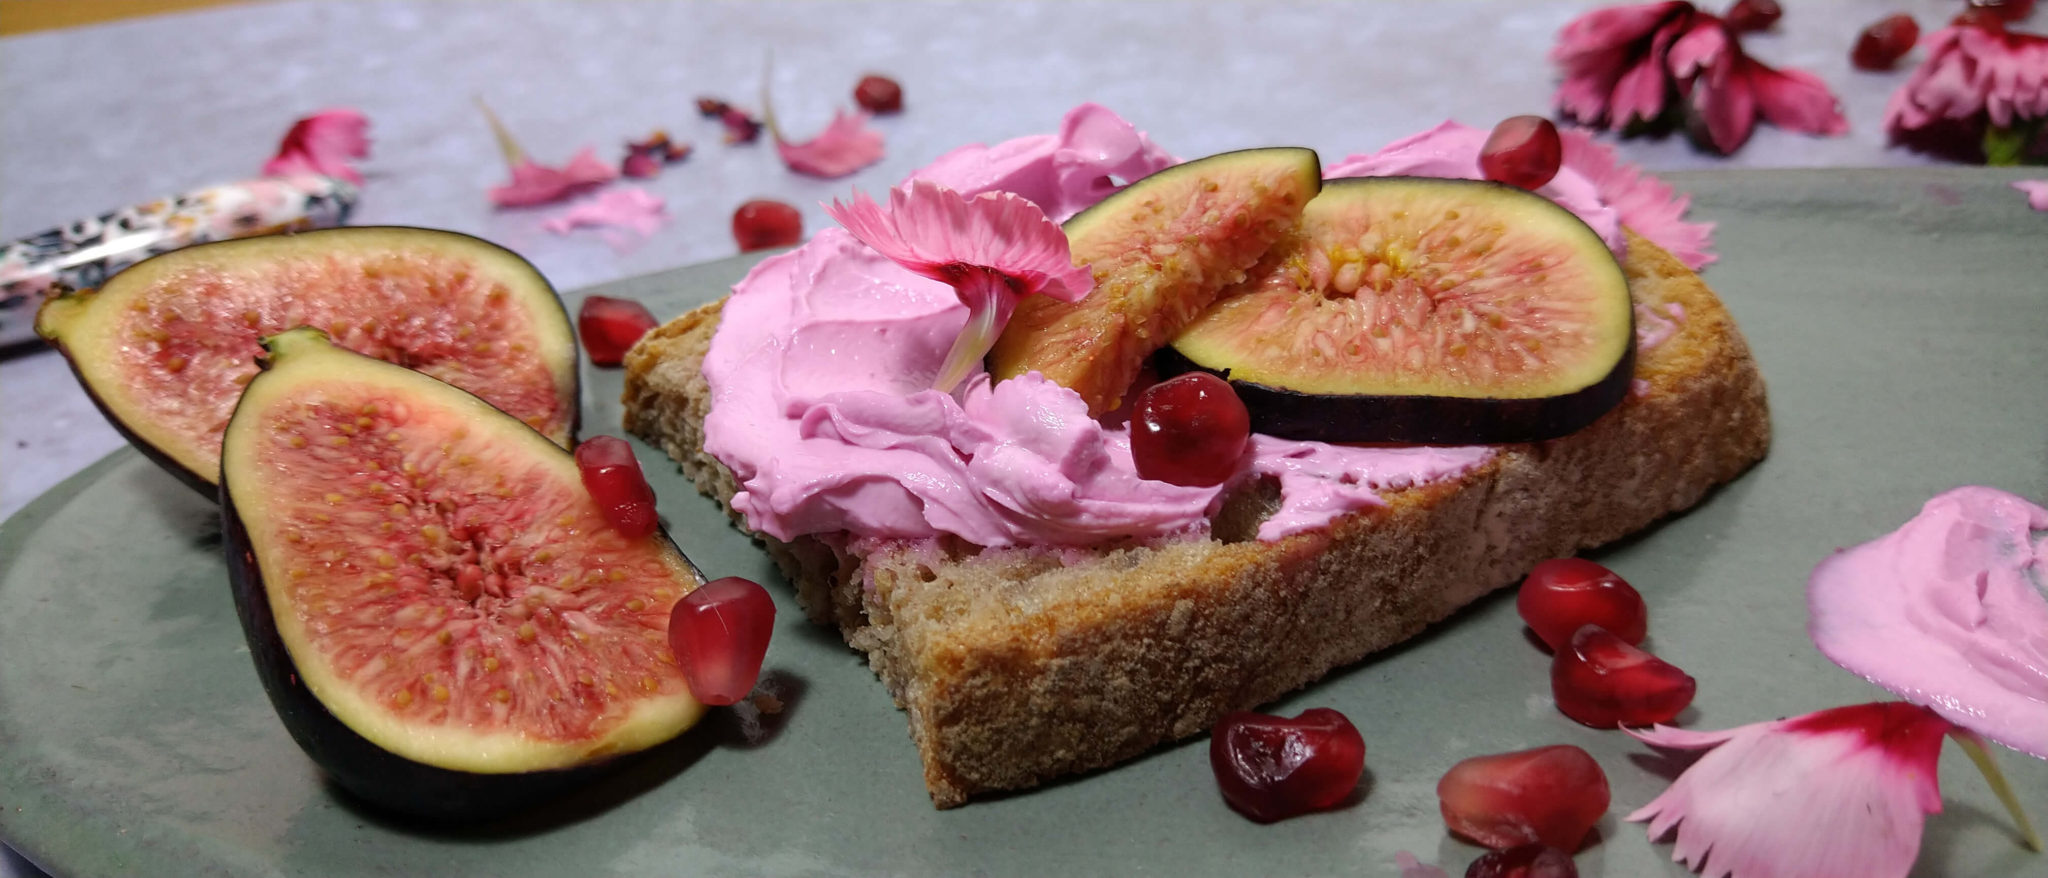
We created some amazing food set-ups to show you the results you can get at home, along with some top tips on how to use the cameras on our new smartphones to their best effect. As you can see here in this shot of pink toast, figs and pomegranate, the 21:9 aspect ratio allows for interesting perspectives and details for an impressive, involving shot.
 Xperia 10 Plus – Get the shot: 21:9 aspect ratio; ISO 64; Exposure time 1/50s
To showcase the different shots that the Xperia 10 and 10 Plus can take, we pictured the same dipped croissants in three distinct ways.
Here, we used the Bokeh effect to make the pastries at the front more prominent, while still capturing the vibrant colours of the overall setup.
 Xperia 10 – Get the shot: 21:9 aspect ratio; ISO 191; Exposure time 1/50s
When using a standard camera, the Bokeh effect works best when there is substantial distance and depth in the shot. But when it comes to food photography, that’s not something you’re likely to have. On the Xperia 10 and 10 Plus, the in-built effect does the work for you, even at close range.
Both devices also have easy-to-use Manual settings that can mean you can alter the ISO, Exposure and White Balance. Below, you can see the effect of changing the White Balance from a cool, blue effect to a warming yellow.
 Xperia 10 – Get the shot: 21:9 aspect ratio; ISO 186; Exposure time 1/50s
 Xperia 10 – Get the shot: 21:9 aspect ratio; ISO 250; Exposure time 1/50s
The 21:9 display is your best friend here. Alter the settings and you’ll see instantly how the picture will look on your 21:9 Wide screen. It’s always best to alter the settings on the camera rather than trying to filter the picture afterwards.
Needless to say, the Xperia 10 and 10 Plus aren’t just standouts when it comes to photography – they also take 120fps slow-motion video.
Here, a simple video of seasoning being sprinkled on a salad is given added punch by using slow motion. Be sure to try it yourself using careful, deliberate movements to get the best result.
If you’ve opted for the Xperia 10 Plus, one of its key camera features is the 2X optical zoom*, allowing for closer, eye-catching detail without physically moving the camera closer to the object. Try it out to capture all the magic your meal has to offer up-close.
Regardless of which device you opt for, you’ll be able to capture more than you ever have before thanks to the 21:9 ratio. When you begin using this ratio, you’ll quickly realise you have more ‘space’ in the picture than usual… which means you can fill it with more intricate and arresting details.
 Xperia 10 – Get the shot: 21:9 aspect ratio; ISO 400; Exposure time 1/104s
In the above image, we were able to capture not just the cheese platter, but a host of cutlery, glasses and side dishes to give a real sense of occasion. The almost panoramic nature of 21:9 means you don’t have to worry about ‘cutting off’ a beautiful table set-up.
 Xperia 10 – Get the shot: 21:9 aspect ratio; ISO 250; Exposure time 1/50s
While 21:9 is ideal for flat-lay shots, we’d also recommended getting up close to the dish for an astounding effect. In the above shot, the layers of food appear to ‘pile up’ in an interesting jumble of flavours and colours. Steady your smartphone with a phone mount or tripod if necessary.
 Xperia 10 Plus – Get the shot: 21:9 aspect ratio; ISO 250; Exposure time 1/60s
To get the best result, you’ll need to find some natural light, but keep your set-up out of direct sunlight. Soft light filtered through clouds is ideal, and if the sun is streaming through the window you can even improvise by putting up a bedsheet!
Have you taken incredible food photography using your Xperia? Show us your pictures on social media, tagging #Xperia.
*This feature is available for still images only
The post Bon Appetit! How to take perfect food photography using your Xperia appeared first on Sony Mobile Blog.
Source: Sony Mobile Blog
—